 Dies ist der zweite von drei Teilen, in denen ich von meinen bisher recht spärlichen Erfahrungen mit Linoleum erzähle. Im ersten Teil habe ich davon berichtet, dass das Schneiden von Linoleum mit dem Werkzeug, das ich mir gekauft hatte, ganz schön schwierig war. Deshalb hatte ich mich nach Softlino umgesehen - Merle vom Book Arts Forum hat mir großzügigerweise gleich ein Paket mit ihren Resten fertig gemacht, von dem sie sagte, dass sie es nicht mehr brauche. Leider ist es immernoch nicht angekommen. In einer anhaltenden und lebhaften Diskussion mit vuscor haben wir verschiedene andere Möglichkeiten des Materialdrucks diskutiert, und meine Neugierde wurde immer größer. Anfang Oktober kam dann eine Freundin aus Minneapolis, Minnesota nach Bonn zu Besuch - und sie hat mir nicht wenig von einem Stempelmaterial mitgebracht. Das habe ich natürlich gleich angefangen zu bearbeiten. Und das soll heute auch Thema dieses Posts sein. Im nächsten und letzten Teil geht es dann um ein Buch zum Thema Materialdruck, das ich euch ans HErz legen möchte und nochmal im Detail um Schnittwerkzeug.
This is the second of third posts where I show you what I have learned from 3 or 4 weeks of doing lino cuts. In
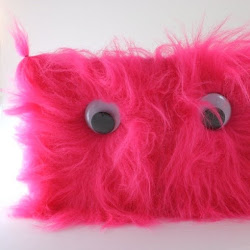
 the last post I told you that I found cutting the lino a pleasure and pain at the same time. To reduce the pain and increase the pleasure I started looking for softer materials. Merle from the Book Arts Forum generously sent a package on the way to me with rest of soft lino she still had - unfortunately it hasn't reached me yet. In the meantime I was getting more and more curious and wanted to try other things than just lino. At the beginning of October a friend from Minneapolis came visiting, and she brought me a rather big amount of stamping rubber :-) I was so happy when I started cutting it. My knifes went through the material as if it was butter. On the left you see the first stamp that I produced.
You think it not as good as my lino cuts? - Right you are. The material is easier to cut through, but that doesn't mean it is easier to produce good prints from it.
Dieses Stempelmaterial war erstmal total super! Das Schneiden war so einfach und leicht! Und man kann ein einem Tempo Bilder aus dem Material schneiden, von dem ich bei Linoleum nur träumen könnte. Nach den ersten bescheidenen Versuchen (s.o.), habe ich mich dann an ein etwas größeres Projekt gewagt:
 Das kleine Büchlein heißt 'Love'. Zum Klischee passend sind die Seiten innen rosafarben. Übrigens handelt es sich um das mit roter Beete gefärbte Papier. Der Umschlag besteht aus Lokta Papier, und ich habe es schon so blau gekauft. Der ganze Inhalt sind 6 Drucke, alle aus dem Stempelmaterial geschnitten. Auf jedem Stempel sieht man drei Wesen um einen Gegenstand fliegen, auf einem etwa Fliegen um einen Scheißehaufen, auf einem anderen Ufos um einen Planeten.
 Diesmal habe ich jeweils einfach mit einem Bleistift auf dem Material gezeichnet und dann losgeschnitten. Anders als beim Linoleum kann man hier auch schmale Grate stehen lassen, weil das Material eben ganz gummiartig ist und nicht wegbricht. Genau an der Stelle, bei der ich die Brüchigkeit des Linoleums gelobt habe, beim Ausarbeiten feinerer Details, ist dieses Material dann allerdings problematischer gewesen. - Jedenfalls mit dem Werkzeug, das ich zu diesem Zeitpunkt noch hatte.
Im ganzen war ich von dem Material erstmal ziemlich enttäuscht. Es ließ sich zwar wirklich leicht bearbeiten, aber schöne Drucke davon zu produzieren war keineswegs leichter, und ich habe das Zeug erstmal weggelegt. - Bis heute!
Right after this first try with butterflies I started a slightly bigger project: the booklet 'Love'. You can see it in the photo above. It is a pamphlet binding with 6 sheets of paper inside. The inside pages are those that I colored with beet root b.t.w. The content of the booklet are 6 prints, or stamps, cut from this rubber stamping material:

- three butterflies circling a flower
- three UFOs circling a planet
- three mosquitos circling a candle flame
- three moths circling a light bulb
- three astronauts circling their star rocket
- three flies circling a piece of sh*t
 Therefore I ordered new (and better) tools (more about this in the next and final post). And turned back to linoleum - until today! Yesterday I bought a new book that I will review in the next post (tomorrow), from which I learned to print in colors. One of the techniques, the jigsaw puzzle, works just so much better with the soft material that I tried that again. And - with the new tools also the rubber cuts much better! The print to the left is a stamp of that material, printed with stamping ink (not linoleum paint as the others). I made it with a combination of the jigsaw method and the reduction method: I sketched the lion head with a pencil on the rubber. I cut away the pieces that form the mane. Then I cut the face completely away from the rest of the stamp (which than had a hole in the middle of course). I pressed the mane on a black and the face on a blue ink pad. I plugged the face back in the mane and voilá - I had a two-colored stamp. I stamped with that on a piece of paper. The result was a black mane with a blank blue face in the middle. I repeated this several times. Then I cut away everything from the face that is not black in the print. Pressed it on the black ink pad and stamped the contours of the face onto the prints.
With this soft material one can have small lines because the material is rubbery and doesn't break away like linoleum. I could do something similar with linoleum but if you want lines, this material is probably better suited.
Der Grund weshalb ich heute doch nochmal das Stempelmaterial hervorgeholt habe war, dass in dem Buch, das ich morgen ausführlicher besprechen will, verschiedene Methoden besprochen werden, wie man mehrfarbige Drucke erzeugen kann. Eine davon wird Puzzlemethode genannt. Dabei schneidet man seine Druckplatte in verschiedene Stücke, färbt sie unterschiedlich ein und setzt sie dann wieder zusammen. - Und dafür ist dieses Stempelmaterial wie gemacht:
 An diesem Ampelmännchenstempel sieht man schön, wie ich den Grünen erst rausgeschnitten, getrennt eingefärbt und dann wieder eingesetzt habe. Der Stempel liegt auf Abdrücken, die ich teilweise auch anders gemacht habe, das ist vielleicht irreführend. Ein Druck nach der beschriebenen Methode sieht dann so aus:
 Dabei habe ich dann auch festgestellt, dass sich mit meinem neuen Werkzeug, das ich ebenfalls morgen erst besprechen werde, auch dieses Material sehr viel besser schneiden lässt. So schlecht finde ich es jetzt gar nicht mehr. Eben jedes Material für seinen Zweck. Der Löwe oben ist auch ein Stempel. Außerdem ist er ist nicht mit Linoldruckfarbe sondern mit Stempelfarbe gedruckt.
Eine andere Methode mehrfarbig zu drucken ist die Reduktionsmethode: Man druckt mit einem Druckstock (Stempel) in einer Farbe, schneidet dann etwas Material weg und druckt in einer anderen Farbe nochmal. So habe ich das Gesicht des Löwen weiter oben gemacht. Und das hier ist ein sehr simples Beispiel für diese Art zu drucken, das ich als Etikett benutzt habe:
 Dafür hatte ich einen Stempel aus dem zunächst nur die innere weiße Fläche herausgeschnitten war. Damit habe ich gelb gestempelt. Dann habe ich aus dem selben Stempel Rechtecke aus dem Rand rausgeschnitten (übrigens mit Hilfe eines Skalpels, kein anderes Werkzeug) und dann damit mit blau drübergestempelt.
Final judgement:
The cutting of and printing with this rubber material turned out very easy after I had new and sharp tools.
It is easy to have small lines since the material is not brittle. Sharp corners and delicate details are still harder to do (for me impossible to do) than with linoleum.
It seems to me that with them it is better to print with ink pads too. Which probably that is not altogether a surprise since they are stamps.
But to me they don't look as good as lino cuts. There is something different about those that is hard to describe. I did the lion's head also with linoleum; this is just a trial proof on a probably unsuited paper in gray lino color. Do you see the difference?
 In my simple prints it is maybe not visible at all.
I am very much looking forward to working with the soft lino, to see if that makes the difference!
Mein endgültiges Urteil: Der weiche Material macht Spaß, weil es so leicht und schnell zu verarbeiten ist. Außerdem sieht man darauf den Bleistift gut. Man sollte vielleicht lieber Stempelfarbe als Linoldruckfarbe benutzen. Ich habe nicht so viele verschiedene Stempelkissen, aber mein Experiment oben mit dem Löwenstempel scheint das nahezulegen.
Irgendwie mag ich letztendlich aber Linolschnitte doch noch lieber. Das Druckbild sieht irgendwie anders aus. 'Zum Vergleich habe ich den Löwenkopf auch nochmal in Linoleum geschnitten. Direkt hier oben drüber ist habe ich einen Probedruck davon in grauen Linolfarbe eingebunden.
Ich finde es schwierig, genau zu sagen, was es ist, und in meinen einfachen Schnitten ist das vielleicht gar nicht zu sehen, aber mir scheint, mit dem Stempelmaterial verschmieren die Kanten mehr. Vielleicht ist es auch was anderes, ich kann das schlecht genau sagen.
Ich freue mich jedenfalls schon auf das weiche Linoleum, um zu sehen, ob das nochmal anders ist.
Das war's dann für heute. Morgen geht es mit dem Review des Buchs 'Drucken ohne Presse' von Anne Desmet und Jim Anderson und einem Bericht über mein neues Werkzeug weiter - bis dann!
P.S.: Just in time before posting this, I saw vuscor's remark on the post on the lion print. He pointed us to this discussion about the differences between soft rubber material and traditional lino: http://www.flickr.com/groups/
1 comment:
Hehe, die Idee mit dem Minibüchlein und den Dingen, die um etwas fliegen, ist klasse! Und der Löwenkopf gefällt mir auch sehr.
Post a Comment